CiCi Makes

My Favorite Doll Dress

March 29, 2018 by Cici

I love making doll dresses with my mom.

And my doll likes getting new dresses, so it’s a win-win for both of us.

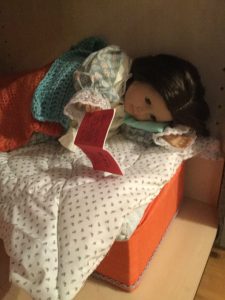
But there is one dress I absolutely adore.

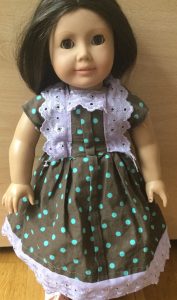
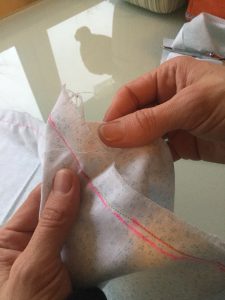
It has lace and bluish greenish dots.

It is such a nice dress but it’s also a little fancy.

It is perfect for having a Sunday picnic.

The Sunday picnic.

Or for having a birthday party.

It’s also nice for Mother’s Day.

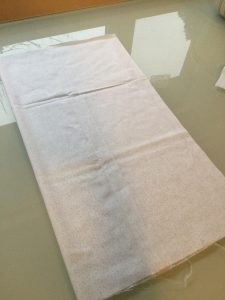
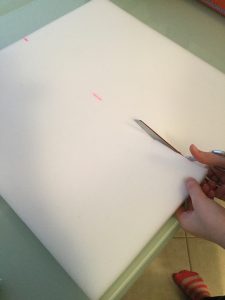
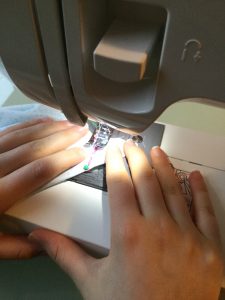
I usually don’t make dresses during the school time with my mom because we are busy with school.

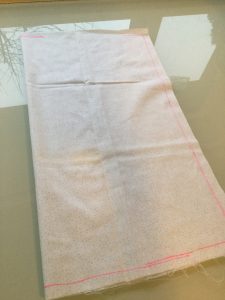
But when we do get around to doing it, we always have fun.

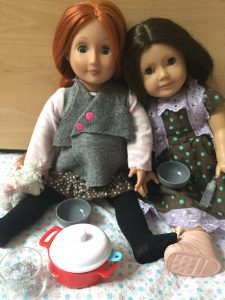
After we finished the dress, I quickly put it on my doll.

I have a grand time doing it all.

What is really cool about this dress is that I have one just like it for me to wear. My mom and I made it together.

The dress is really cool because you can wear just about any shoes with it. Well, just about any shoes….

Just about any shoes.


Filed Under: American Girl Dolls, Our Generation Dolls

How to Make a Mattress for an 18″ Doll

January 31, 2018 by Cici

A mattress for 18 inch dolls beauty sleep.

My doll
Is reading
Before bed.

My doll has lots of wonderful friends.

But what better way to get to know her friends then to have a slumber party?

In the past, my dolls have had lots of slumber parties, but when it is finally time for them to hit the hay, they don’t have a good mattress to sleep on.

This past Christmas, my mom made my little sister, Willow, a mattress for her doll.

And my mom said that the mattress was really easy and fun to make!

She also said that she would be happy to help me make one for my doll if I would like that.

Of course I would, so that is what we did.

Supplies Needed:

1: Thread
2: Sewing Machine
3: Scissors
4: Fabric
5: Foam
6: Highlighter
7: And a doll

The supplies
That I used
For this project.

Now don’t worry, there are only 13 steps to make this mattress and most of them are pretty easy.

Step one: Choose your fabric. You will need a little more than twice the total size of your bed size.

My fabric that
I wanted to use
For this project.

Step two: Measure your foam with a highlighter. I marked in three places so that it was easy to get a straight line.

Because I was using thinner foam, I cut two pieces to make a thicker mattress. My total dimensions are 50cm  long by 25 cm wide which is about perfect for a girl like an American Girl doll. My finished depth once both pieces were put together is 3.5cm. (In inches, the dimensions should be Length-20 inches, Width- 10inches, Depth-1.5 inches)

I am measuring my
Foam with a ruler
And highlighter.

Step three: Cut your foam.

I am cutting my foam.

Step four: Fold your fabric in half, then place your foam top of it leaving at least a 2 inch edge all the way around. I just cut it without making marks, but you could mark that out first if you wanted to.

My fabric that
I folded in
Half.

Step five: Use a highlighter to mark roughly one inch away from the fabric you just cut, make marks for you to sew on like I did below. I don’t know how well you can tell from the picture, but one side is folded so we don’t need to sew along that edge. One long edge and one short edge we are sewing up. The remaining short edge we are only sewing about 2.5 inches in on each side. This will allow you to turn the fabric inside out and put the foam inside when you are done.

I am highlighting the marks for my mattress.

Step six: Lets get started with your sewing machine. This is the easy part.  All you have to do is sew over your highlighted lines you just made.

I am sewing
My highlighter marks
That I pinned.

Step seven: Now you will pull all four corners flat.

I am pulling the ends of the fabric
Flat.

Step eight:Grab your ruler, its about 4 cm on a ruler. Put the ruler onto your corner that you flattened and trace with a highlighte going straight across the seam you made. You are making a triangle.

I am highlighting 4 cm
With a ruler.

Step nine: Now pin in a pin and sew over all four of your edges. One at a time. This is making what we call, “box corners”!

I am sewing over the four corners.

Step ten: Now you will grab your scissors and snip a little above the four corners. You are just getting rid of excess fabric so that it will lay nice when you flip it inside out.

I am cutting the top
Above the sewing
marks I made.

Now fold your mattress cover inside right.

Step eleven: WE ARE ALMOST DONE!!!! We are close to victory! This next step is probably the easiest step there is. All we need to do is to fold your foam in half and put it into your mattress cover. This takes a little bit of work to wiggle it it, but you can do it.

I am putting my mattress
Cover over my foam.

Step twelve: Now fold your ends of your mattress in.

I am folding my ends.

THE LAST STEP: Sew your folded edges up with a needle and some thread.

I am sewing my end up with a needle and some thread.

I like this mattress because my doll can have her beauty sleep.

I also like that it was fun and easy to make.
This is a perfect mattress for my dolls house because I get to style the mattress. I can make it fit the style that I have for her house.

I am forever in love with how it turned out.

AND NOW LET THE SLUMBER PARTY BEGIN!!!!!!!!!!!!!!!!!!
I hope your doll gets lots of good sleep.
This craft was enjoyable for me to make with my mom. I hope you have as much fun as I did making it.

Since I have made this mattress with my mom, my doll has had the best sleep ever.

Filed Under: American Girl Dolls, Crafts, Our Generation Dolls

DIY American Girl Computer

January 20, 2018 by Cici


American Girl DIY computer

My American Girl doll with her computer.


I had thought of this DIY computer last year when I was 9 years old.

I wanted my doll to call her friends like I call my friends. I decided it was time to take action.

So the first thing I did was gather my supplies.

Then I tried to find a post card. Feeling very lucky that I had actually found one because we hardly ever have post cards in our house.

I proceeded to ask my mom if I could use this lucky post card. I was feeling even luckier then ever when my mom said YES!!!..

Woohoo!!!!.. I was on track to victory.

I was not exited for the next step to making this computer because I really needed some cardboard.

We usually are always using are cardboard boxes for holding wood chips after stacking up the firewood.

But my mom had found a good sized peace of cardboard that I could use.

So all the supplies I used for this project were.

1: pencil
2: ruler
3: cardboard
4: colorful paper
5: post card
6: scissors
7: paint
8: paint brush
9: a simple glue stick for school
10: and a happy attitude

These are all of my suplies except for the paint and paintbrush.

The first thing I did was put the post card on top of my cardboard.

This is my post card on top of my card bored.

Then I traced around the post card on to the cardboard like you do when you have a little sister and you trace her hand on to a card to send to your grandma.

I traced the outline of the postcard onto the cardboard.

Then you cut out on the traced lines you just made.

I am cutting out my lines I just made on cardboard with the postcard.

After you cut out your cardboard then you are going to want to fold your cardboard in half.

I folded my cardboard in half.

Then you will get some regular or colorful paper for the outsides of your computer.

My paper that will go on my computer as a cover.

Now you have to glue your colorful paper onto your computer.

I am glueing my pretty paper onto my computer.

I put my post card onto my cardboard and cut it to fit onto my computer.

The next step is to glue you lucky postcard to your cardboard for the picture.

I just glued my postcard to my computer.

Now you are going to need to cut out four long pieces of cardboard and paint them.

You are going to want to paint them black.

I am painting four pieces of cardboard and painting them black.

Now the waiting begins. I am personally not a patient person so I used quick drying paint. Either I had fast drying paint or the time was a rolling.

The waiting begins.

Once it has dried you are going to want to cut them out to fit around your picture.

Cutting out my painted cardboard pieces for my computer.

Then once that is done you will glue them onto your picture that’s on your computer.

This is my computer so far.

Now get a ruler and a pencil and don’t forget to grab your computer and trace lines onto your keyboard. (Or you could make squares on your key bored)

I am tracing my lines(you will want to trace several lines on your computer).

Now you are going to put the alphabet in those squares and also numbers like ( 1,2,3,4,5,6,7,8,9,0) onto your key board

I put the alphabet in and numbers in on my computer.

And you have just made your first doll computer.

This is my doll with her very own computer we just made.

Now get the address book and get your doll some friends.

My dolls friends.

I hope you have enjoyed making a doll computer for your America Girl.

This is my doll Cristy with her new computer.

I really hope that while you were making this computer for your doll that you always had a smile and a positive attitude.

I hope you had as much fun as I did making this computer.

Filed Under: American Girl Dolls, Crafts, Our Generation Dolls

My Favorite Doll.

January 12, 2018 by Cici

Our Generation Doll

Me and my sister both got Our Generation dolls for Christmas a year ago.

Our dolls are best friends forever.

I was very excited. The real names of our dolls are Peyton and April. My doll is Peyton and my sister, Willow, got April.

My sister is 3 now, but when she got April she was two. April is a good quality doll. She has lasted my sister for a whole year and is still intact.

My sisters doll April.

Me and Peyton (my doll) have cherished every fun time we have had together.

My doll Peyton.

I had really gotten into doing my own hair. So my mom and dad thought that I would like a doll with long hair that I could practice on.

They got me Peyton for Christmas. Peyton is a perfect doll for me because she has hair all the way down to her ankles.

There is one thing that I don’t like about this doll. She has a button that you can wind up and it pokes out on the lower part of her back. This button allows you to lengthen or shorten a small section of her hair from the tip middle of her head.

A little piece of hair that can go short or long.

It limits her outfits that she can wear as some shirts and skirts get caught on this button.

Her button on her back

It mainly affects skirts, pants and shirts. Which is just about every thing a doll can wear, except for dresses. But it is not that bad if you don’t mind having a plastic button poking out of her.

I still love my doll and cherish every moment. I actually have two dolls, an American Girl doll and Our Generation doll.

Don’t think that America Girl dolls are the same as Our generation dolls because they aren’t at all the same. Though they do have many similarities like being 18 inches with plastic arms, legs, and heads.

My beloved doll Cristy.

An American Girl doll is fatter then an Our generation ( O.G.) doll. And it has soft eye lashes.

Our generation dolls have a skinny body and slightly curved arms compared to American Girl ( A.G.) dolls.

I like both of my dolls and have fun playing with both of them.

Dolls with Long Hair are Awesome!

Over the years I have wanted long hair, but as you know it takes a while to get long hair.

I dreaded having to wait to have long hair. But then in the mall they finally got a doll store. I was so exited that I wanted to go immediately.

When the day came that we finally went to this new doll store I walked in and there she was, staring right at me, the most beautiful doll with very, very long red hair and sea blue eyes.

My doll Peyton.

Christmas was coming and that’s what I really wanted. Then on Christmas Day I got this big box. I tore off the wrapping paper and there she was, Peyton.

I took her out of the box. Her long silky beautiful hair lay gently on her back.

That day I played with her for a long time. Then the time came for me to put her to bed.

Our dolls are best friends forever.

I have had lots of fun with her to this day. Her long hair lets you have your own hair salon at your own house.

Because of her long hair you can do just about every hair style there is in the book as long as you have the skill or desire to learn.

I think that long hair is the best on dolls because there is no limit to their hair.

This doll has opened some imagination with hair I didn’t think I ever had.
For example, crocheting hair and weaving her beautiful hair and lots more. This doll is the one that inspired me to learn how to do a Dutch braid and Fishtail braid. I have learned unique skills to become better with hair.

But if you have an Our Generation doll with clumpy hair you can’t seem to get untangled, you can use lotion and warm water and a brush. With some gentle, persistent work she can look good as new in no time.

Our dolls Peyton,Cristy, and April

Filed Under: American Girl Dolls, Our Generation Dolls

Categories

  • American Girl Dolls
  • Birds
  • Crafts
  • Crochet
  • Earings
  • Hair
  • Our Generation Dolls
  • Paper Dolls
  • Stuffed Animals

Recent Posts

  • Paper Dolls
  • How To Make American Girl Doll Earrings
  • Real Doll Crutches
  • Birds
  • My Favorite Doll Dress

Copyright © 2025 · Minimum Pro Theme on Genesis Framework · WordPress · Log in