CiCi Makes

Paper Dolls

April 23, 2018 by Cici

A while ago when I was little, my grandma came to visit us.
I was still a very little girl so I don’t  remember much.

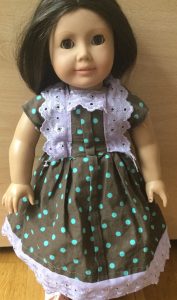
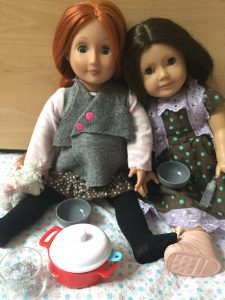
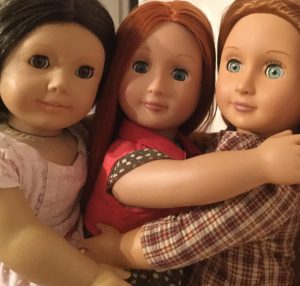
I do remember when she brought us American girl dolls that had been hand-me-downs.

And she also brought us paper dolls.

My older sister was given Kit Kitteridge American Girl paper dolls.

I thought they were pretty cool but I liked mine more because I like the time period that mine lived in.

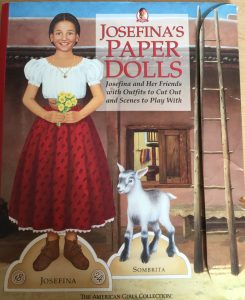
This was my paper doll set.

I have played with them a lot.

But now that I am getting older,I don’t usually play with paper dolls.

But the good thing about having a little sister is that she gets your old things that you don’t need or have grown out of.

My older sister gave me her paper dolls once she grew out of them.

I, then, gave the paper doll set to our little sister.
She plays with them a lot and loves them.

I still haven’t decided what to do with my old paper dolls that I didn’t give to my sister.

Someday, I will probably give them to my sister too.

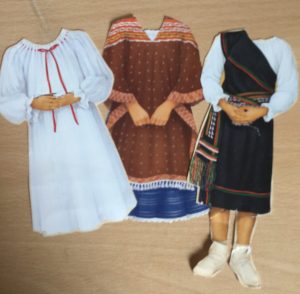
The set comes with three girls.

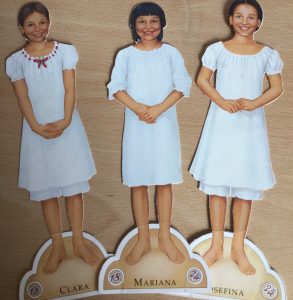
The three paper dolls
That the set come with.

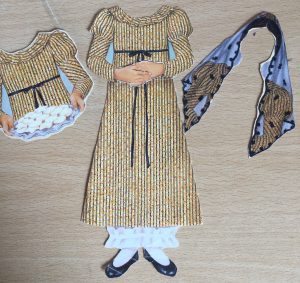
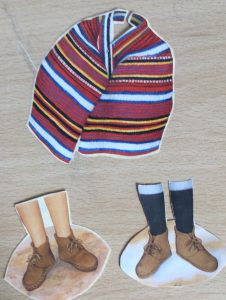
There are lots of dresses and animals.

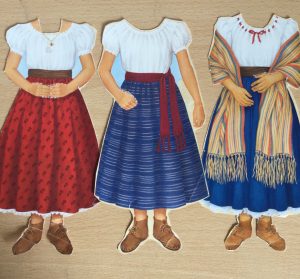
There are everyday dresses
And work dresses.

There are riding dresses
And there are  going to town
Dresses that also can be used
When going to someone’s
House.

There are a lot of animals in the paper doll set because they live on a ranch.

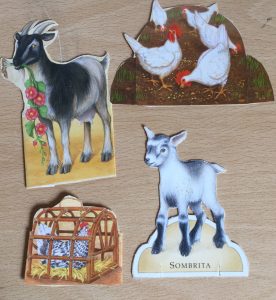
The ranch needs lots of animals.


Sometimes there is a party and they don’t need to wear regular clothing.

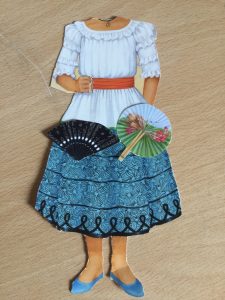
This is their party dress.

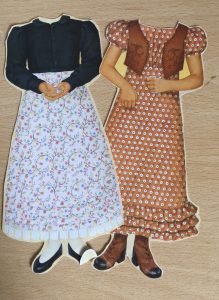
On the back of the dressses, it tells you what they are used for and it comes with a little story.

There are some dresses
That are accompanied with fancy accessories
For get togethers
And family reunions.

There are three dresses
That go with Josifina’s
Friend.

They come with a pallet of sticking dots that you put on the doll to let the dresses stay on.

Filed Under: Paper Dolls

How To Make American Girl Doll Earrings

April 19, 2018 by Cici

Recently, my dad took me to get my ears pierced. A few days later, I came up with a wonderful idea. What if I made American Girl doll earrings?

By the way, this also works for any 18 inch doll, including Our Generation dolls.

I already pierced my dolls ears a long long time ago and had my moms earings in my dolls ears.

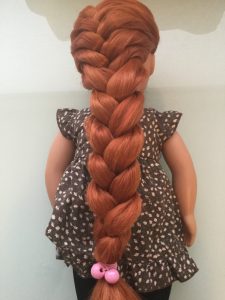
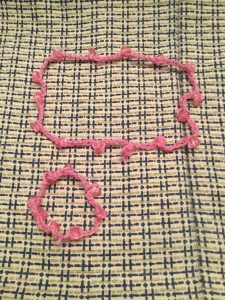
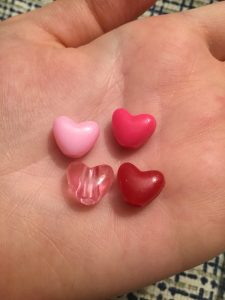
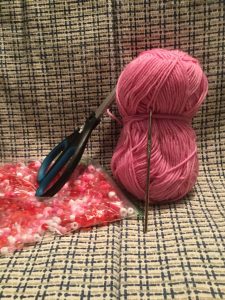
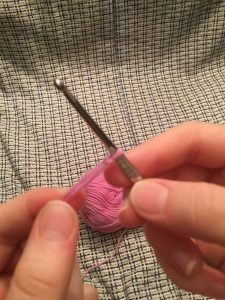
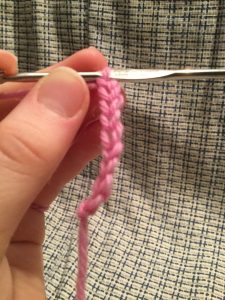
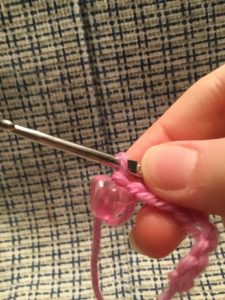
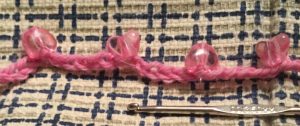
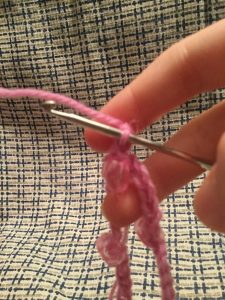
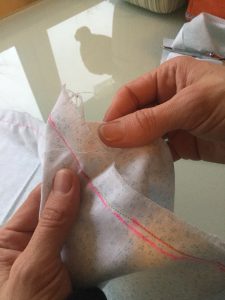
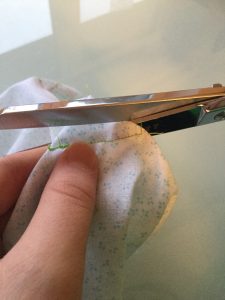
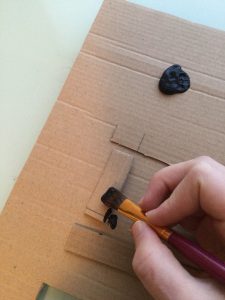
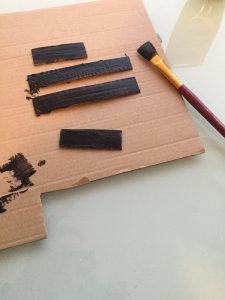
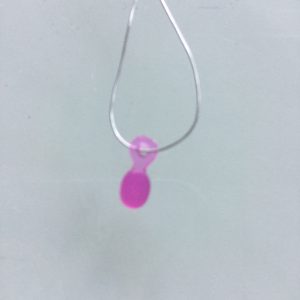
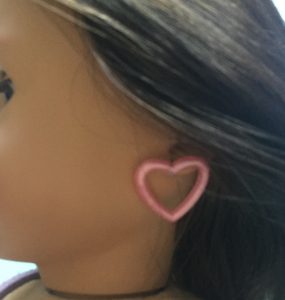
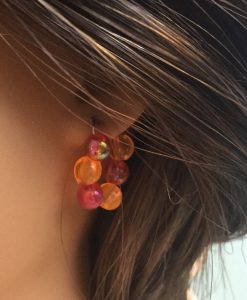
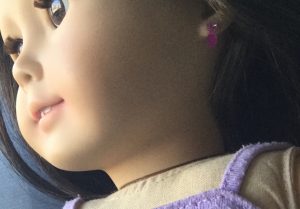
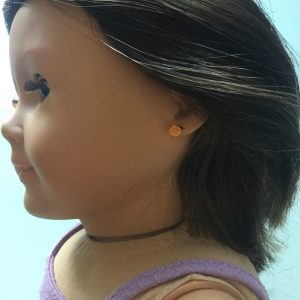
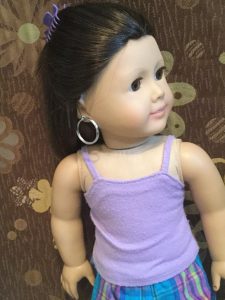
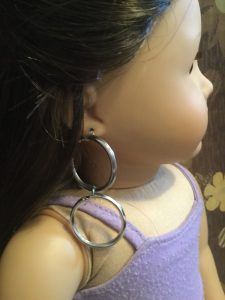
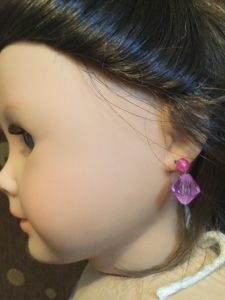
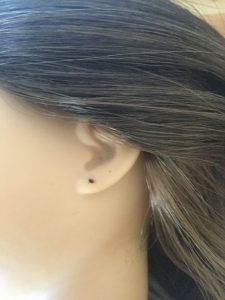
Now I decided to make my own earrings for my doll.

I took a pretty good size of wire and folded it in half.

Then I put on a bead.

I had some really cool beads.

Then I poked it in her ear. It is as simple as that.

That may not look like a bead, but it is.

Now my doll can wear earrings in her ear.

The picture up above may be a little deceiving. It looks like the earring is all the way through her ear but the truth is it is just looped around to the back.

When I pierced my dolls ears, I had her wear earrings in her ears for a while so that the hole would stay.

I have pierced one of my dolls ears. And my mom has also pierced one of my dolls ears.

The first one that I did, I didnt keep in my dolls earring very long so my dolls hole is now to small.

So I need to pierce her ears again.

I love having my dolls ears pierced because they look so so sooooo good.

They look really good when her hair is down.

Sometimes I like to be creative when I make doll earrings.

I have taken a picture below and as soon as you see them you will know why it is the most creative one. I like some of my creative earrings, but some don’t do it for me.

I have had some really weird ones like the double hoop below.

I like the individual hoop, but not the double hoop.

The two below don’t even use beads.


  • I love having my doll wear earings with me. The more beads the better. And they can wear your exact earring if you have a matching bead.
  • The nice thing about
    Earrings made with beads
    Is you can make them
    match your
    Clothes and they look
    Really good in any doll.

Filed Under: American Girl Dolls, Earings

Real Doll Crutches

April 12, 2018 by Cici

This is how I discovered a unique way to make crutches for my doll.

My grandparents came over to visit us. We went fishing and hiking.  We had lots of fun.

One of the days (with my grandparents) we went hiking, While we were hiking, I saw a V shaped stick that was a little longer then my doll.

I then had the great idea of taking it back home with me and cutting it to be my dolls crutches.

And what do you know? My doll had her own pair of crutches. Well, she has only one crutch, but it totally works.

If you decide on giving your doll crutches then you probably need to decide that you won’t play with her, AT ALLL!!!!!!

My doll takes lots of rest. EVERY DAY!!!!!

Well, you can get her dressed, but unless you want to drag crutches around with you everywhere you go, you may not want a doll with a broken leg for very long.

I makes sure to let her
Practice walking to
Her bed and back
Every day.

I really wanted to play with my doll, but she broke her leg.

The most I got to play with  her was taking her to doctor visits and having her rest every day.
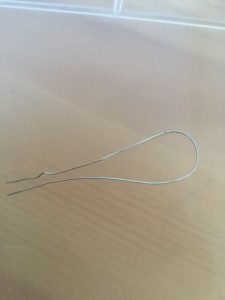
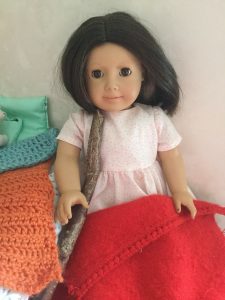
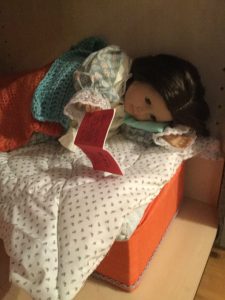
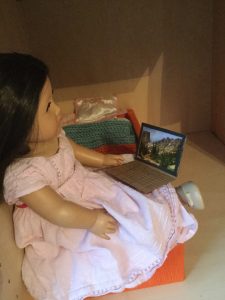
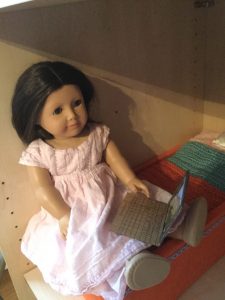
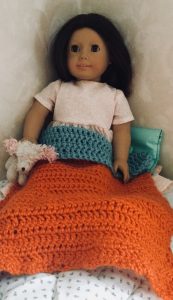
which is not too bad.    My doll rests in bed almost all the
Time.

As you can imagine, she didn’t have a broken leg for long.

It was for three weeks, but I pretended it was much longer, like a couple months or so.

I still have the crutches (the piece of wood) but I don’t use it that often.

I don’t think I ever will get rid of them.

It’s in my doll  basket for now.

I have two dolls, so I can pretend that my one doll has a broken leg.

And I will still have my other doll to play with.

At first, it’s really fun to have your dolls leg broken, but then after a wile you get  tired of the idea.

If you ever do have a doll whose leg is broken, then make her have a quick recovery. 🙂


Filed Under: American Girl Dolls

Birds

April 5, 2018 by Cici

Birds

We all love birds. They sing in the summer.
They bathe in puddles when it is fall.
And shiver in the winter.

They can be a pest some times, like if you have a dog and dog food. They will help themselves to the dog food as if they were invited, which they never were.

But as I sat down one day to do school, I saw a little bird who went into my brothers bird house.

This is my brothers bird house.

She kept looking out of it to see if someone was coming.

Then she left and the next day she was back. Then she left and the next day she was back again.
I kept thinking that she was afraid that someone would harm her, but she seems more confident.

If you ask me, I would say she has babies. She wants them to be warm and away from other birds.

I decided that I would repaint my bird house that I got many many years ago, and put it in a tree so that another bird could have a home.

I have repainted it purple and bluish green.

My bird house.

I hope that once it gets out there that another bird will make its way to its new home.

And that that bird would find my bird house as nice as the last nest it had.

Filed Under: Birds

My Favorite Doll Dress

March 29, 2018 by Cici

I love making doll dresses with my mom.

And my doll likes getting new dresses, so it’s a win-win for both of us.

But there is one dress I absolutely adore.

It has lace and bluish greenish dots.

It is such a nice dress but it’s also a little fancy.

It is perfect for having a Sunday picnic.

The Sunday picnic.

Or for having a birthday party.

It’s also nice for Mother’s Day.

I usually don’t make dresses during the school time with my mom because we are busy with school.

But when we do get around to doing it, we always have fun.

After we finished the dress, I quickly put it on my doll.

I have a grand time doing it all.

What is really cool about this dress is that I have one just like it for me to wear. My mom and I made it together.

The dress is really cool because you can wear just about any shoes with it. Well, just about any shoes….

Just about any shoes.


Filed Under: American Girl Dolls, Our Generation Dolls

My Lion

March 29, 2018 by Cici

Sometime around my birthday I was out shopping with my family. We saw a really cute doll that I wanted.

When it was my birthday, my parents took me to a toy store.

I went in and I saw the doll that I had wanted.

But then I saw a lion. Yes a lion. And I wanted the lion instead of the doll. But it wasn’t a real lion. It was a stuffed animal. My parents bought me the lion for my birthday then we picked up a few other things and went home.

I have loved my lion.

This is my Lion also
Known as Tiger.

I sleep with her a lot. I think she is a mountain lion. But my family says it’s a lioness.

My little sister, who is only 3, calls my lion a tiger.

I have pondered over what name I should call my lion, and then it hit me, I would call her Tiger after my little sister calling her a tiger.

My little sister doesn’t know the different between a lion and a tiger.

But I am sure we all know that there is a difference.

I love my lion because she is so so big.

My sister, who is 14, doesn’t like me sleeping with my lion because it is so big.

Filed Under: Stuffed Animals

French Braid Your Dolls Hair

March 15, 2018 by Cici

How to do a French Braid in your Dolls Hair.

I love doing my doll’s hair and my own hair. This is why I have a doll with super long hair.

My dolls long hair.

I started practicing with my own hair, but it was extremely nice to practice on my dolls hair because I could see what I was doing.

You really only need about 2 things: a brush and a hair thing. I believe that it is a necessity to have a good water spray bottle.

The supplies I used:
One: Brush
Two: Hair thing
Three: Water spray bottle

My supplies.(I didn’t use hair spray, but it is an option)

Step one: Brush out your dolls hair so that it is very smooth.

Step two: Grab a medium piece of hair about where your bangs are if you brushed them back and divide it into three equal parts.

My three pieces of hair
I pulled back.

Step three: Do your first twist on your braid like I did below.

My twist I did.

Step four: Now grab a medium piece of hair from the right side of your head and add it to it your braid.

Step five: Next, you are going to take the right side and middle piece of your braid and twist them.

Step six: Now take a piece from your left side and add it to your braid and twist them like before.

Just repeat all the way down your head (remember to do the left, then the right, left, then right, left, then right, etc.)

When you get to the bottom you have two options.

You can either make a pony tail or continue on like a regular braid.

I prefer to do a regular braid, but it is your choice.

And you are done.

I absolutely love this hair style and I hope you do too.

I like the hair style in my hair because it looks so cute.

Filed Under: American Girl Dolls, Hair

DIY Valentine’s Crochet Bracelet and Necklace.

March 2, 2018 by Cici

Valentine’s Crochet Necklace and Bracelet.

I had just been given some Valentine’s beads and wanted to put them to use.

I decided that I would make a  Bracelet and Necklace.

My Bracelet and Necklace.

The first thing you need to do is choose your beads.

My beads that I had to choose from..

I used bead hearts and pink yarn.

All my supplies I used were:

One: crochet hook
Two: heart beads
Three: scissors
Four : yarn

These are the suplies I used.

LETS GET STARTED!!!!!

Make a slip knot first.

This is my slip knot.

Now do as many chain stitches as you want.

These are my chain stiches.


Next you are going to want to put your bead onto your hook and do a slip stitch.

This is my slipstitch with bead on it.

Now every four stitches just add a bead until you have your desired length.

Now that you are finished with your desired length,you are going to want to grab your end and do a chain stitch but this time you need to do a slip stitch.

I have grabbed my ends and
 did a slip stitch.

Now to make the bracelet just do all the measurements but this time do all of them smaller to fit your wrist.

I love this necklace and bracelet because it is quick, but so fun.

My Bracelet and Necklace.

I can make them in a matter of minutes and you can too.

Filed Under: Crafts, Crochet

How to Make a Mattress for an 18″ Doll

January 31, 2018 by Cici

A mattress for 18 inch dolls beauty sleep.

My doll
Is reading
Before bed.

My doll has lots of wonderful friends.

But what better way to get to know her friends then to have a slumber party?

In the past, my dolls have had lots of slumber parties, but when it is finally time for them to hit the hay, they don’t have a good mattress to sleep on.

This past Christmas, my mom made my little sister, Willow, a mattress for her doll.

And my mom said that the mattress was really easy and fun to make!

She also said that she would be happy to help me make one for my doll if I would like that.

Of course I would, so that is what we did.

Supplies Needed:

1: Thread
2: Sewing Machine
3: Scissors
4: Fabric
5: Foam
6: Highlighter
7: And a doll

The supplies
That I used
For this project.

Now don’t worry, there are only 13 steps to make this mattress and most of them are pretty easy.

Step one: Choose your fabric. You will need a little more than twice the total size of your bed size.

My fabric that
I wanted to use
For this project.

Step two: Measure your foam with a highlighter. I marked in three places so that it was easy to get a straight line.

Because I was using thinner foam, I cut two pieces to make a thicker mattress. My total dimensions are 50cm  long by 25 cm wide which is about perfect for a girl like an American Girl doll. My finished depth once both pieces were put together is 3.5cm. (In inches, the dimensions should be Length-20 inches, Width- 10inches, Depth-1.5 inches)

I am measuring my
Foam with a ruler
And highlighter.

Step three: Cut your foam.

I am cutting my foam.

Step four: Fold your fabric in half, then place your foam top of it leaving at least a 2 inch edge all the way around. I just cut it without making marks, but you could mark that out first if you wanted to.

My fabric that
I folded in
Half.

Step five: Use a highlighter to mark roughly one inch away from the fabric you just cut, make marks for you to sew on like I did below. I don’t know how well you can tell from the picture, but one side is folded so we don’t need to sew along that edge. One long edge and one short edge we are sewing up. The remaining short edge we are only sewing about 2.5 inches in on each side. This will allow you to turn the fabric inside out and put the foam inside when you are done.

I am highlighting the marks for my mattress.

Step six: Lets get started with your sewing machine. This is the easy part.  All you have to do is sew over your highlighted lines you just made.

I am sewing
My highlighter marks
That I pinned.

Step seven: Now you will pull all four corners flat.

I am pulling the ends of the fabric
Flat.

Step eight:Grab your ruler, its about 4 cm on a ruler. Put the ruler onto your corner that you flattened and trace with a highlighte going straight across the seam you made. You are making a triangle.

I am highlighting 4 cm
With a ruler.

Step nine: Now pin in a pin and sew over all four of your edges. One at a time. This is making what we call, “box corners”!

I am sewing over the four corners.

Step ten: Now you will grab your scissors and snip a little above the four corners. You are just getting rid of excess fabric so that it will lay nice when you flip it inside out.

I am cutting the top
Above the sewing
marks I made.

Now fold your mattress cover inside right.

Step eleven: WE ARE ALMOST DONE!!!! We are close to victory! This next step is probably the easiest step there is. All we need to do is to fold your foam in half and put it into your mattress cover. This takes a little bit of work to wiggle it it, but you can do it.

I am putting my mattress
Cover over my foam.

Step twelve: Now fold your ends of your mattress in.

I am folding my ends.

THE LAST STEP: Sew your folded edges up with a needle and some thread.

I am sewing my end up with a needle and some thread.

I like this mattress because my doll can have her beauty sleep.

I also like that it was fun and easy to make.
This is a perfect mattress for my dolls house because I get to style the mattress. I can make it fit the style that I have for her house.

I am forever in love with how it turned out.

AND NOW LET THE SLUMBER PARTY BEGIN!!!!!!!!!!!!!!!!!!
I hope your doll gets lots of good sleep.
This craft was enjoyable for me to make with my mom. I hope you have as much fun as I did making it.

Since I have made this mattress with my mom, my doll has had the best sleep ever.

Filed Under: American Girl Dolls, Crafts, Our Generation Dolls

DIY American Girl Computer

January 20, 2018 by Cici


American Girl DIY computer

My American Girl doll with her computer.


I had thought of this DIY computer last year when I was 9 years old.

I wanted my doll to call her friends like I call my friends. I decided it was time to take action.

So the first thing I did was gather my supplies.

Then I tried to find a post card. Feeling very lucky that I had actually found one because we hardly ever have post cards in our house.

I proceeded to ask my mom if I could use this lucky post card. I was feeling even luckier then ever when my mom said YES!!!..

Woohoo!!!!.. I was on track to victory.

I was not exited for the next step to making this computer because I really needed some cardboard.

We usually are always using are cardboard boxes for holding wood chips after stacking up the firewood.

But my mom had found a good sized peace of cardboard that I could use.

So all the supplies I used for this project were.

1: pencil
2: ruler
3: cardboard
4: colorful paper
5: post card
6: scissors
7: paint
8: paint brush
9: a simple glue stick for school
10: and a happy attitude

These are all of my suplies except for the paint and paintbrush.

The first thing I did was put the post card on top of my cardboard.

This is my post card on top of my card bored.

Then I traced around the post card on to the cardboard like you do when you have a little sister and you trace her hand on to a card to send to your grandma.

I traced the outline of the postcard onto the cardboard.

Then you cut out on the traced lines you just made.

I am cutting out my lines I just made on cardboard with the postcard.

After you cut out your cardboard then you are going to want to fold your cardboard in half.

I folded my cardboard in half.

Then you will get some regular or colorful paper for the outsides of your computer.

My paper that will go on my computer as a cover.

Now you have to glue your colorful paper onto your computer.

I am glueing my pretty paper onto my computer.

I put my post card onto my cardboard and cut it to fit onto my computer.

The next step is to glue you lucky postcard to your cardboard for the picture.

I just glued my postcard to my computer.

Now you are going to need to cut out four long pieces of cardboard and paint them.

You are going to want to paint them black.

I am painting four pieces of cardboard and painting them black.

Now the waiting begins. I am personally not a patient person so I used quick drying paint. Either I had fast drying paint or the time was a rolling.

The waiting begins.

Once it has dried you are going to want to cut them out to fit around your picture.

Cutting out my painted cardboard pieces for my computer.

Then once that is done you will glue them onto your picture that’s on your computer.

This is my computer so far.

Now get a ruler and a pencil and don’t forget to grab your computer and trace lines onto your keyboard. (Or you could make squares on your key bored)

I am tracing my lines(you will want to trace several lines on your computer).

Now you are going to put the alphabet in those squares and also numbers like ( 1,2,3,4,5,6,7,8,9,0) onto your key board

I put the alphabet in and numbers in on my computer.

And you have just made your first doll computer.

This is my doll with her very own computer we just made.

Now get the address book and get your doll some friends.

My dolls friends.

I hope you have enjoyed making a doll computer for your America Girl.

This is my doll Cristy with her new computer.

I really hope that while you were making this computer for your doll that you always had a smile and a positive attitude.

I hope you had as much fun as I did making this computer.

Filed Under: American Girl Dolls, Crafts, Our Generation Dolls

Next Page »

Categories

  • American Girl Dolls
  • Birds
  • Crafts
  • Crochet
  • Earings
  • Hair
  • Our Generation Dolls
  • Paper Dolls
  • Stuffed Animals

Recent Posts

  • Paper Dolls
  • How To Make American Girl Doll Earrings
  • Real Doll Crutches
  • Birds
  • My Favorite Doll Dress

Copyright © 2025 · Minimum Pro Theme on Genesis Framework · WordPress · Log in